November 28th 2020 – Week 9
Coming full circle: Strats for goal setting and reflection
As the first term of this program begins to wrap up, I’d like to take a moment to reflect. I think reflection and planning go hand in hand. It is my belief that in order to properly reflect on a course/experience, we first need to have some kind of goal/intention setting happen at the beginning. So I thought I would provide some tools for goal/intention setting that I find useful (and has gotten me through the term) and reflection tools (something that I have just started doing for this term).
In the beginning…
Goal Setting is an important part of my preparation, I usually like to have an overall goal and my intention is to write up someone in my home that I see on a semi regular basis. For example my goal for this term was to get at least a B+ average in all of my courses. My Intentions were to learn how to be a better educator, and make connections with my peers.
Tips:
- Make a list! I personally like making up little lists of all the major assignments/ due dates for all of my classes on little sticky notes that I put above my work space. However, if paperless is your jam, check out Trello.
- Put it in a calendar! Either a physical calendar or a Google Calendar.
- Connect! Make a class buddy – someone you can ask for help, double check assignments or bounce ideas off of.
At the end…
Reflection and feedback are such a key part of learning, it is a space where if we are open to it, we can learn about ourselves, what worked and what we could improve on. Reflection can take on many forms, it can be in the form of a journal, a written exercise, a survey, or a closing circle. I hope this helps you in future projects!
November 21st 2020 – Week 8
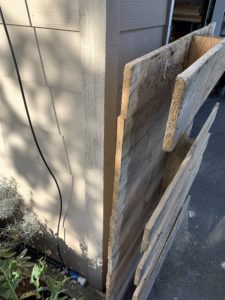
I opted to not build a wooden bottom to my planter box, mostly because I do not intend on moving it ever. However, this doesn’t mean that I am not going to line the bottom of my planter box with nothing BUT I also want to make sure my planter has good drainage.
Why line it? There are three main benefits of lining your raised garden bed are protection against temperatures, pests, and weeds. However, certain liners can also keep soil in your raised bed while allowing water to drain away. Finally, if you build your raised bed out of pressure treated wood or railroad ties, a liner can prevent harmful chemicals from leaching into the soil.
So what do I use?
Landscaping fabric
Landscape fabric is normally used to prevent weeds by preventing them from getting sunlight. It is sometimes made from plastic or recycled materials, and is often sold in rolls at garden supply centres or online. Landscape fabric is somewhat breathable and will allow water to permeate. If you use it to line your raised beds, it will allow the soil to drain while also preventing weeds from growing.
Canvas/Burlap
Canvas or burlap is a durable material made from cotton, linen, or hemp. It is often used for shoes, awnings, and tents. Canvas can also be used for gardening applications, such as grow bags or raised bed liners. Canvas is a durable material, which makes it tougher and longer-lasting than most landscape fabrics. It is also somewhat water-permeable, meaning it will provide for decent drainage if you use it as a raised bed liner.
Plastic
You can use a some kind of plastic as a liner (tarp or paint plastic) However, many of these plastics are waterproof, meaning that they will not allow any drainage if used to line the bottom of your raised bed. Though you could make a couple purposeful holes in the plastic to allow for drainage, but then it won’t be as effect at keeping pests and weeds out of your garden bed.
I’m sure there are some other types of liners that would work, but these are a few of the ones that I found when I was doing some online searching. Personally I’m currently leaning towards either landscaping fabric or canvas fabric as a liner as they drain well and will keep peasts and weeds out!
For more information on liners check out this little video!
November 7th 2020 – Week 7
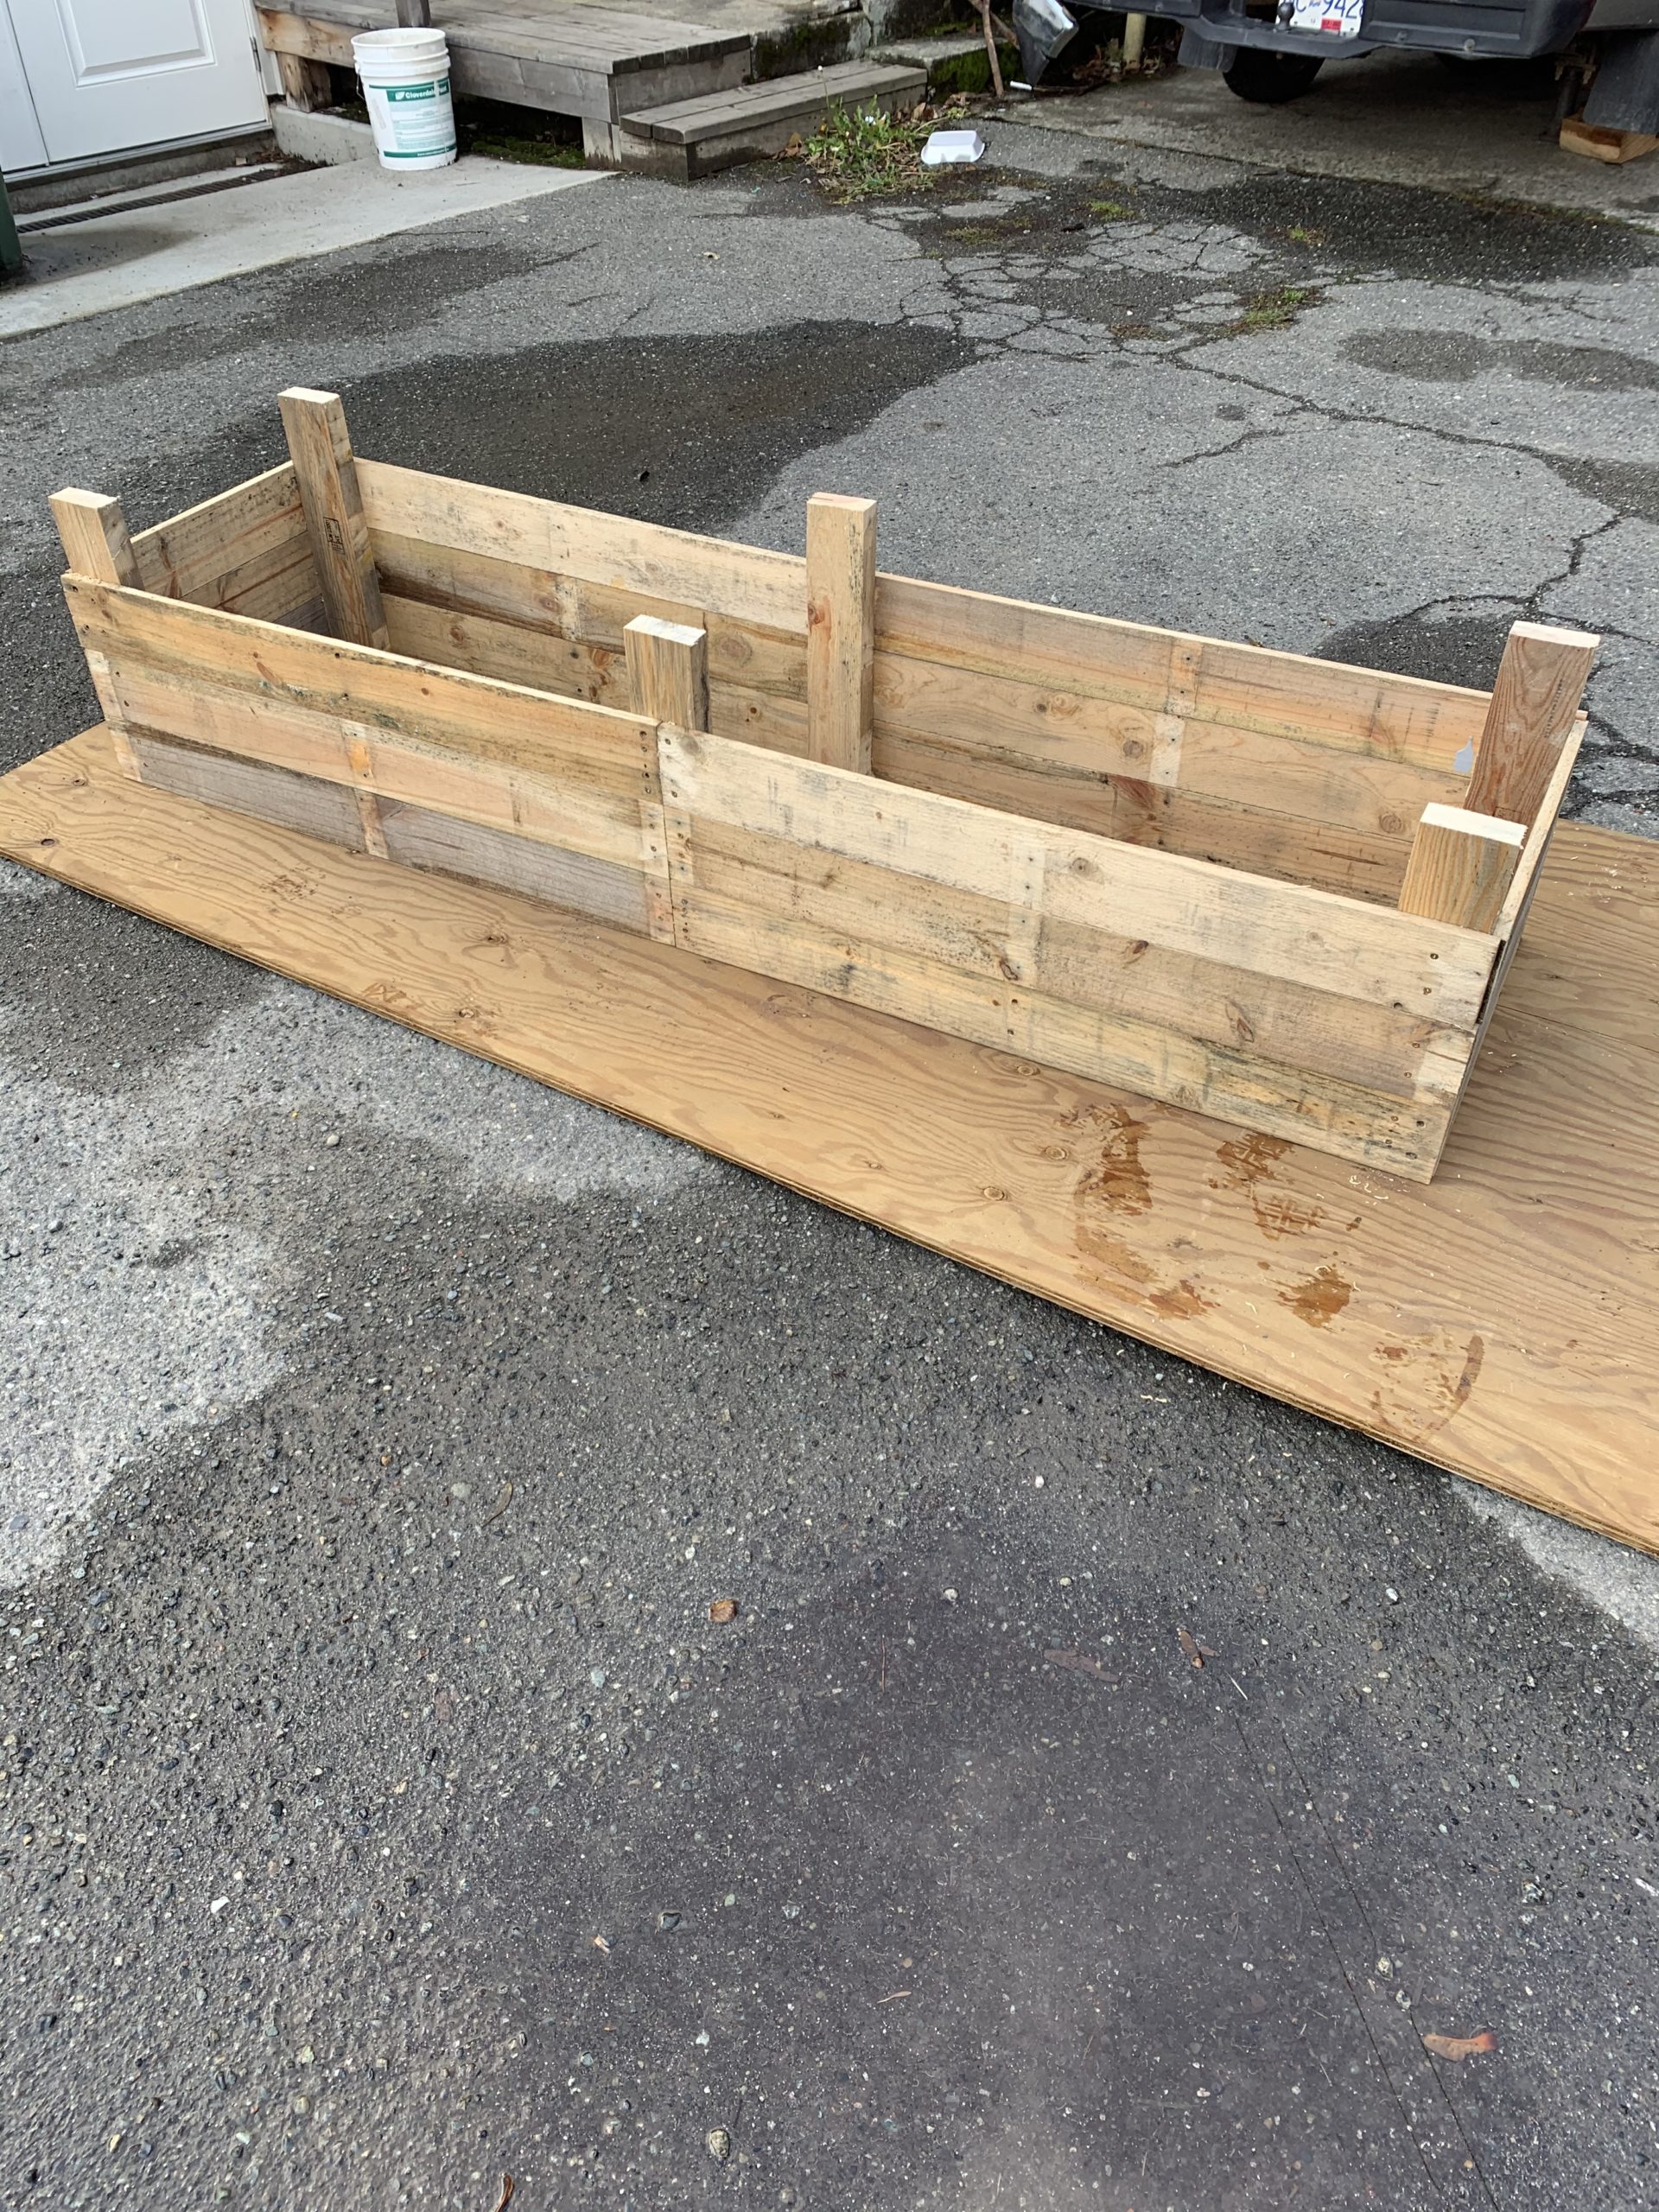
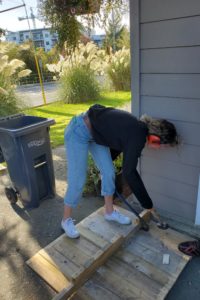
Big big week folks, the planter box has been made! So here are the tools required to putting your own box together and the step by step.
Tools:
- Electric drill
- Robinson’s bit
- Countersink bit
- Wood screws – Robinson’s (72)
- Eye & ear protection
- Sharpie
Step 1: Drop dots for where you would like to put to drill. The dots should be a decent bit away from the edges and from each other.
Step 2: Pre-drill the screw holes using the countersink – this helps to prevent the wood from splitting when you drill in the screws.
Step 3: Once this is done you can start to put it together. I’d recommend starting by building the long end first. Which is what I am doing in the picture below.
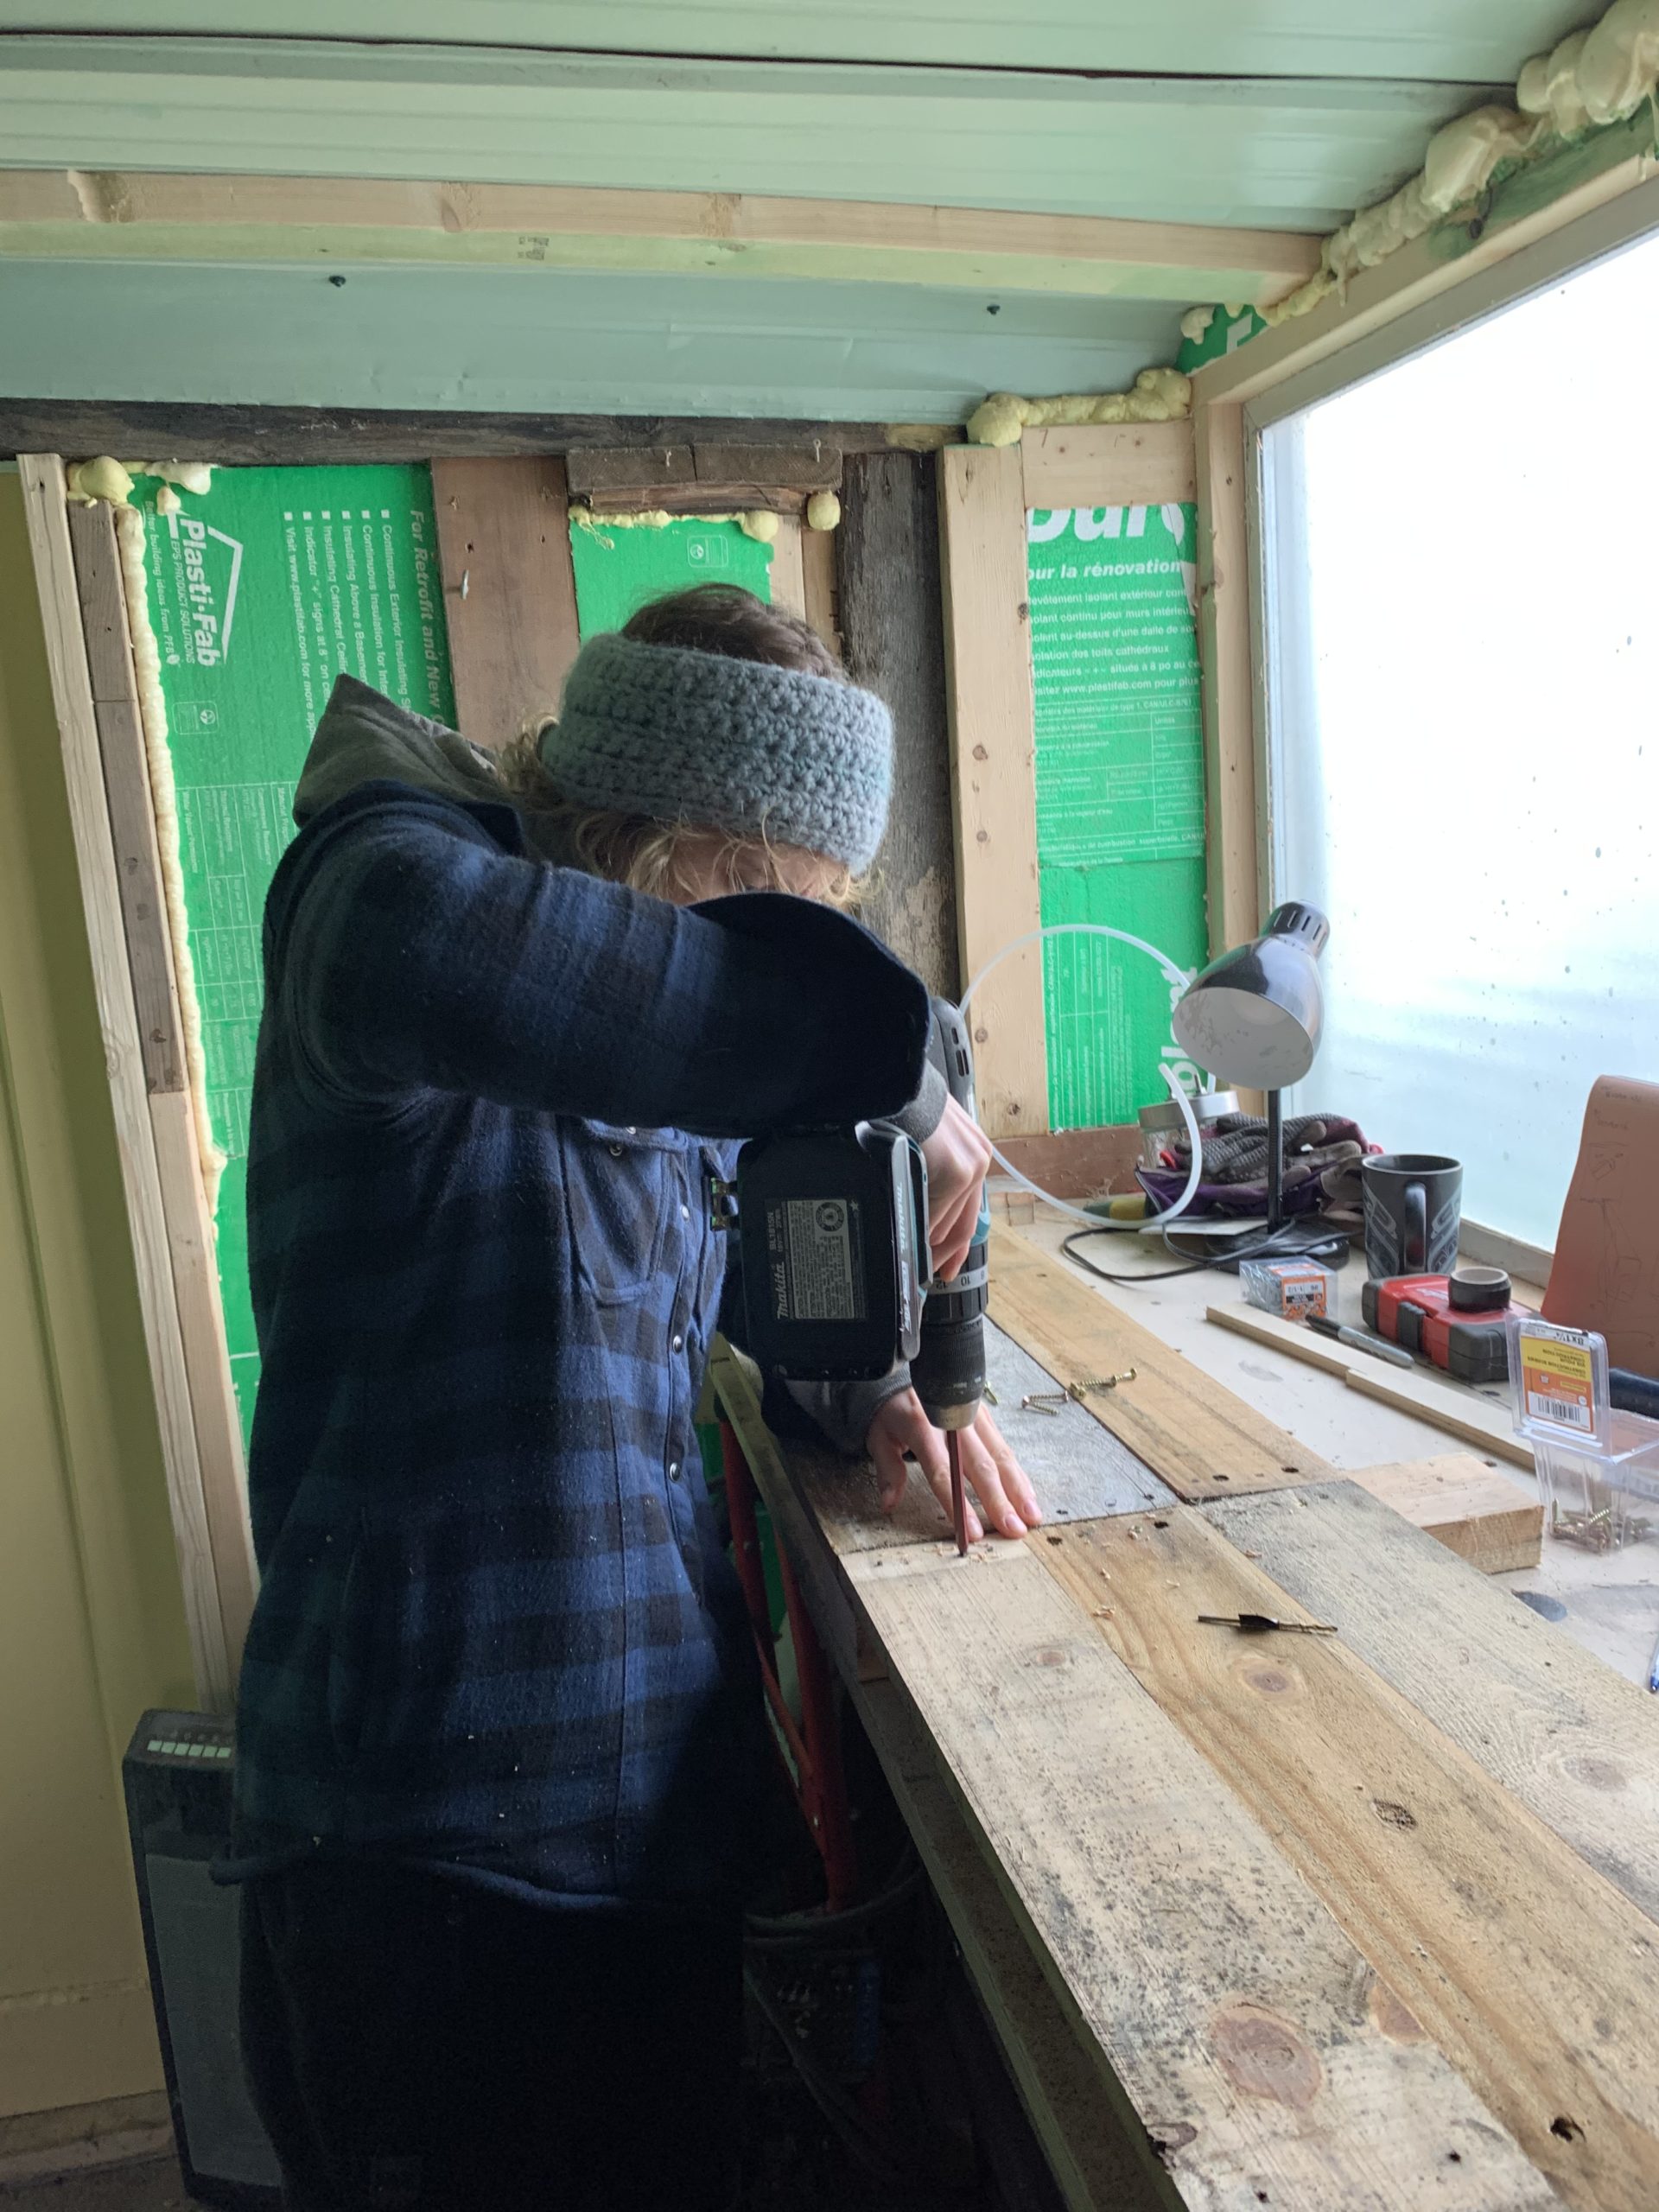
Step 4: Build the end pieces.
Step 5: Time to put all the sides together! To do this we placed the long side on top of a makeshift middle support stake and put the then line up the two short ends up and begin screwing them together.
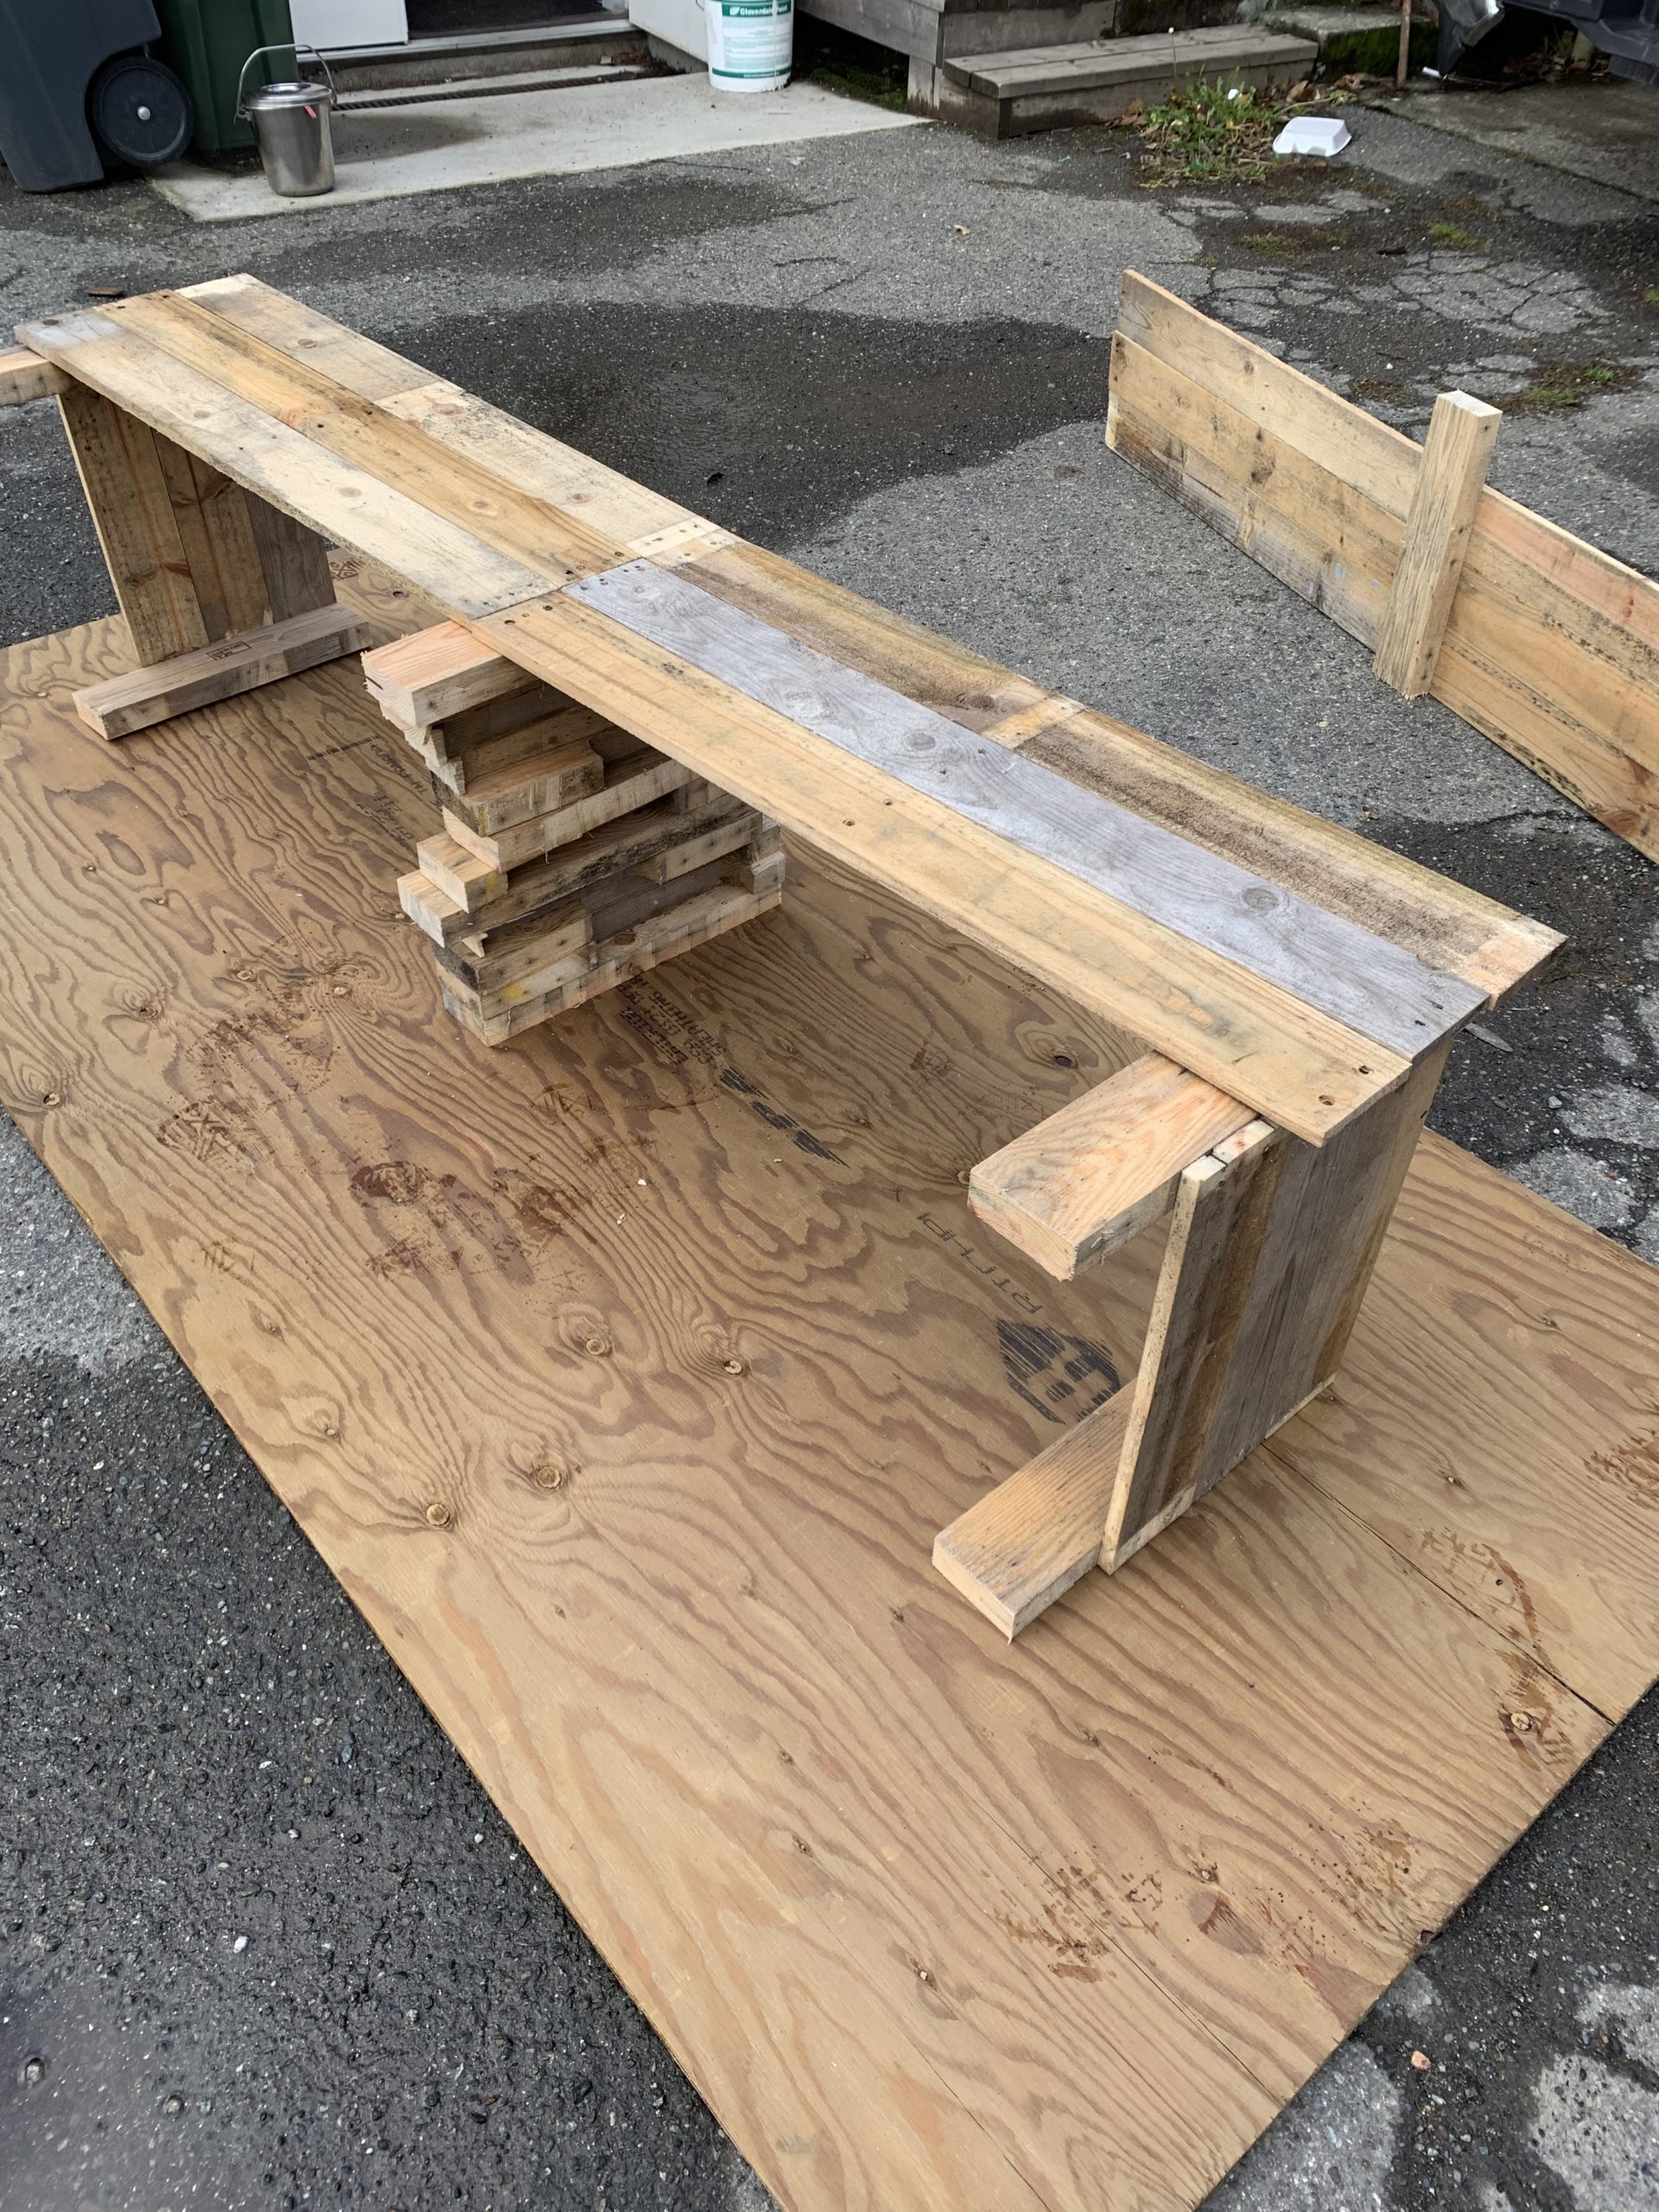
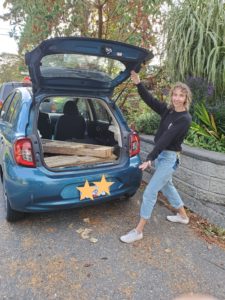
And voila! The planter box is finished! Next step? Decided on a bottom liner and pick what you want to plant!
October 31st 2020 – Week 6
Another key part of the project got finished today, measuring and cutting the planks to the correct lengths. This is the last step before moving on the assemble portion of the project.
Supplies needed:
- Circular saw (a table saw or hand saw would to the job too)
- A tape measurer
- Sharpie marker
- Ear & eye protection
Steps 1: Double check all the measurements that I did during the design/draft portion of the project. Good news is that I must’ve been wearing my glasses during the first round of measurements because everything was correct! So our long planks are 96cm, our short planks need to be 48cm and the height of the box will be around 31 cm, so we are going to cut the support planks to be 32 cm (just to be safe).
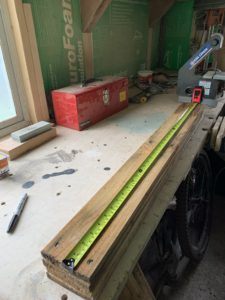
Step 2: Mark out where the cuts need to be on the planks. To do this I used the tape measurer and made a series of dots at the spot that I wanted them cut, then connected the dots to make it a bit easier to see.
Step 3: Actually cutting the planks to the desired lengths. This part is pretty straight forward, we used our battery powered circular saw and sliced them up! However, if you don’t use power tools very often, I would highly recommend looking up a safety video on Youtube or from the products company prior to starting this step. Below I’ve included a little safety video for using a circular saw.
So there you have it, all the planks are cut and ready for assemble!
October 24th 2020 – Week 5
For this
October 17th 2020 – Week 4
Alright, so this week I’m taking a bit of a break from the physical labour portion of this project to work on the design draft. I believe this is an important step in the project, it helps you to visualize what your planter box is going to look like.
Admittedly, I didn’t totally come up with this design totally on my own. My design is based off of a a few different style of planter boxes that I found and liked on Pinterest (check out my earlier blog on how to create your own Pinterest board).
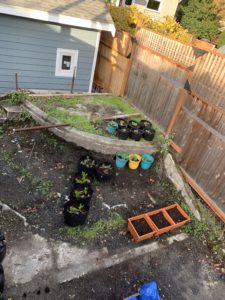
Step 1: So before I even started the my design I spent a bit of time with my tape measurer in my future garden space to get a better idea of what would actually fit in the space. Below is a picture of my space, it was recently cleared out (there use to be just a massive pile of dirt/garbage here), and once it was cleared out we discovered that there was this preexisting concrete garden beds. My household has decided instead of using the preexisting beds, we’d build our own but keep the little tiers.
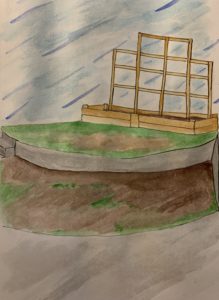
Step 2: I decided to create a concept drawing for the project, mostly because it gave me an excuse play with my water colour paint, but I also like this step because it give you a pretty good idea of what your vision is for the space and what the “final” product could look like.
Step 3: The last step in for the design process was creating an actual draft with accurate measurements for me to work off of for my later steps. For this step I had to count how many planks I would need, their length, the length of the support planks, and the length and height of the box. The little x’s represent where the screws will go, and I’ve decided not to built a wood bottom (I’m not planning on moving the box).

October 12th 2020 – Week 3
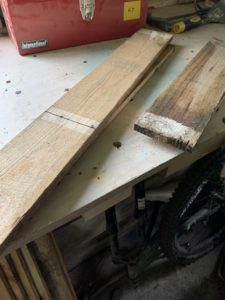
This was a big week for making progress on the pallet planters, and I’m excited to share what I have been up to this holiday long weekend (other than eating way too much pumpkin pie).
I finally picked up the pallets this weekend got straight to work on dismantling them. I haven’t totally figured of what design I want to do, so I decided to leave fully dismantle the pallets into individual pieces. Originally I was planning on just pulling the pallets apart using a hammer, crowbar, and brute force. However, I was chatting with one of my fellow teacher students about the project and they informed me that it is very easy to ruin the wood that way as pallets are often put together with Twist Nails that are tricky to prey without causing damage. Instead my friend suggested that I try to find a Reciprocating Saw and cut the nails instead. Luckily my partners family was nice enough to let me use their reciprocating saw, so I packed up my pallets and headed over to their place.
Here are the step by step instructions on how I took my pallets apart.
What you’ll need
- Safety glasses
- Ear protection
- Hammer
- Crowbar
- Reciprocating saw
- 12 Inch Reciprocating Blade (for nails)
- Two people – you could probably do it all on your own but its very nice having help holding things in place.
Step 1: We started by using the saw to cut the nails along the two outer centre support beams that join/hold the two sides of the pallet together.
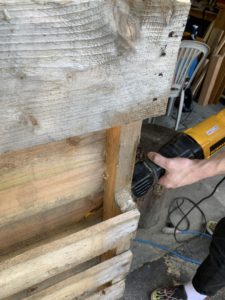
Step 2: Next, we removed the two outer centre joining pieces and laid the it flat on the ground. We then used the crowbar to pull the centre support beam off by hammering the crowbar underneath the beam and using the leverage from the crowbar to pry it off.
Step 3: Now that the pallet was in separate parts, we removed all the nails that were sticking out of the planks of wood from where we had removed the centre support beam. To do this we simply used a hammer to tap the nails out and then used the prying side of the hammer to pull the nail all the way out.
And there you have it, how to dismantle wood pallets in three easy steps!
-CNW
October 2nd 2020 – Week 2
Now that I have my project all picked out, the next step for me was actually deciding on what style of planter box I want create. My method for researching different styles of pallet planters was mostly just me scrolling through Pinterest until I found one that looked achievable with my limited wood working skills and practical for the space that I have.
If you’ve never used Pinterest, its kind of like an internet search engine but the results are little pictures with links to the original source. It’s also pretty neat because you can create “boards” where you can “pin” idea/results for looking at later. Below is a short tutorial on how to create your own “DIY Pallet Planter” board using Pinterest.
September 25th 2020 – Week 1
For my Inquiry project I have decided to try to build a planter from recycled pallets for my garden.
I landed on this idea for my inquiry project for a couple of reasons. The main reason I want to try to build a planter box is because, like many folks this year, I had an usually large amount of free time this spring/summer with not a heck of a lot to do outside of the home. So inevitably my housemates and I started brainstorming projects that we could do around the house. One of the big projects that we took on was excavating/clearing a portion of our back yard space, removing all the rubbish that had built up over years and levelling out the ground in hopes of building a garden space. That project turned out to be a massive undertaking, and by the time we finished clearing out the space, we all needed to take a little break. Now that its been a couple of months and I’m feeling ready to pick up the project again. Hence, deciding to make a planter from pallets.
My next steps to make this inquiry project a reality.
- Find pallets (thanks Rich!)
- Research different styles of planters (thank you Pinterest)
- Locate other materials needed for project. (tools, soil, seeds/plants)
-CNW